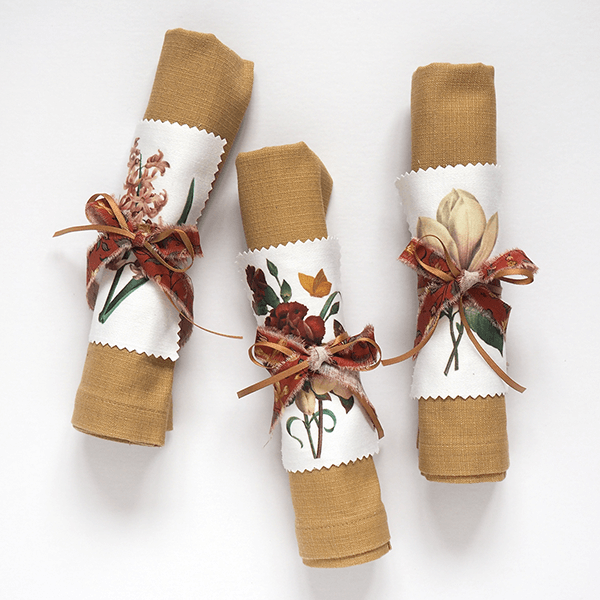
Make antique floral napkin rings
Hi friends,
today I want to share with you a tutorial for a project I made this Easter. It’s not strictly for Easter and you can use other styles for your party if you want.
I love antique illustrations and nowadays it’s not hard to find free images to use online. One of my favourite place is the British Library because they have lots of flowers and typographic elements available. You will need to be able to edit the photo in some cases, but sometimes you just have to print as they are, so don’t worry if you don’t know how to do this.
I wanted to make soft napkin holders and give the illusion of fresh flowers tucked inside the ring. Being the fabric fanatic that I am, I looked for an alternative. This is a tutorial that will take you a couple of hours, depending on how many rings you need to make (I made 8).
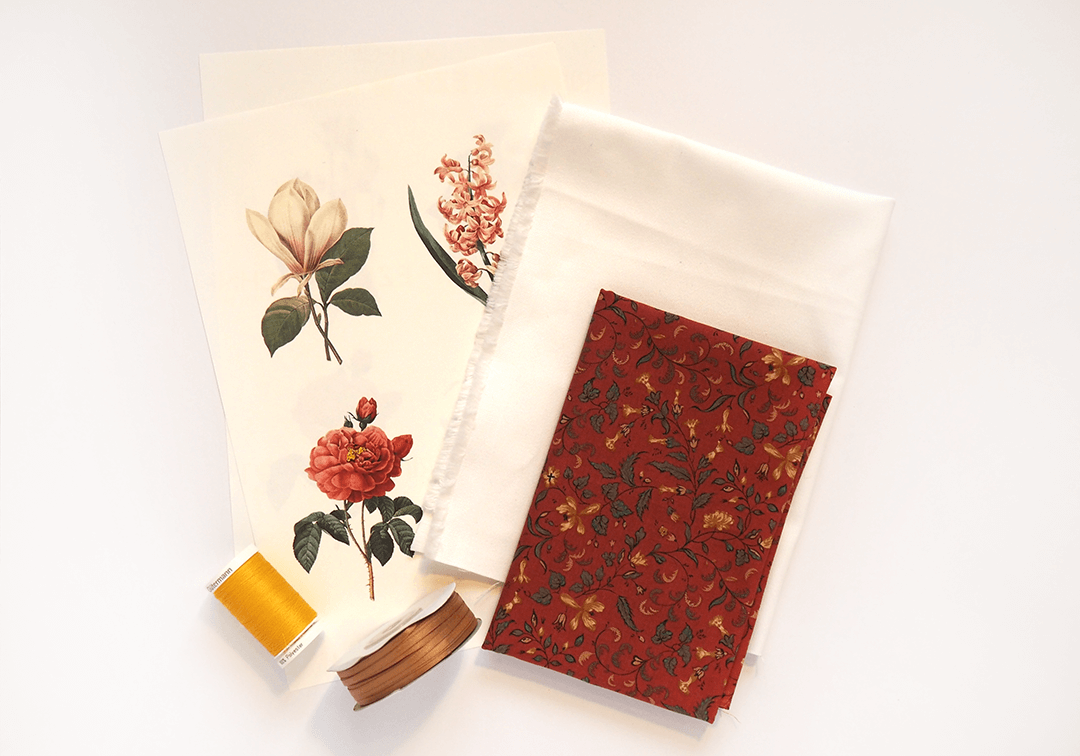
What you will need:
A printer (laser or inkjet)
Some transfer paper (for either laser or inkjet)
An iron
White quilting cotton
1 fat quarter of patterned cotton fabric
5 meters of thin ribbon
scissors, sewing machine or needle and thread
Instructions:
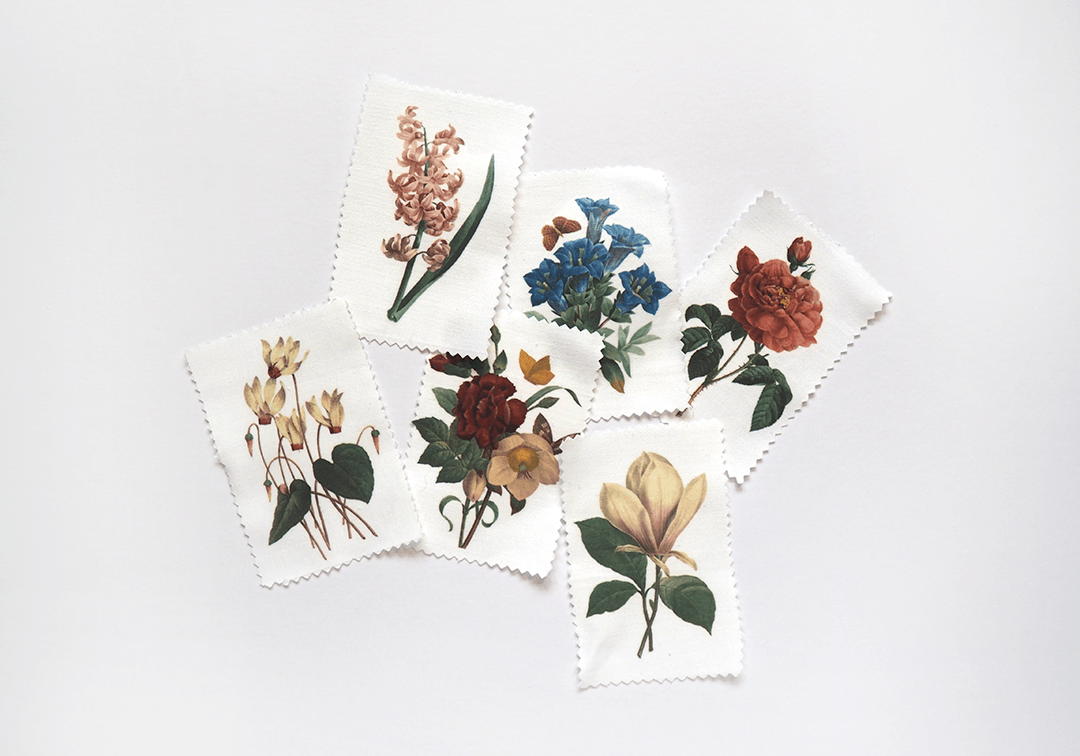
1. Find some pretty illustration that will fit your party style. Create an A4 document on a photo editing software and place your images on it. They need to be roughly the same height and width, so resize your images as required. I kept mine under 8 cm so I could print 8 flowers per sheet. If you can’t remove the background don’t worry, you can still cut around it after printing.
2. Make sure that you mirror your images because they will be flipped once they’ve been transferred on the fabric. You can do that after placing you images. It’s not too important if you’re printing flowers, but you’ll have a bad surprise if there’s text involved!
3. Print on your transfer paper, following the manufacturer’s instructions. Then cut around the flowers.

5. Prepare your fabric pieces. Take the white cotton and cut rectangles of the same size. Make sure the biggest flower fits in it. I wanted to keep a rough edge so I used scissors.

6. Time to transfer the flowers onto fabric. Place each flower face down on the right side of the fabric, and with a hot iron, start heating the paper. I made three at a time, slowly moving the iron on each piece.

You usually need a minute for each pattern, just let it cool down before peeling it off. If you try while it’s still hot, the paper will stick and you could rip the image.

7. Now with the patterned fabric, make little notches with scissors every 2cm. Pull to tear the fabric at the notches to make strips. Make for as many rings as you need.


8. Cut the ribbon the same length as the fabric strips.


9. Place one strip of fabric and one piece of ribbon on top of the transferred flower, pin and stitch on the edges. Repeat for each napkin ring.
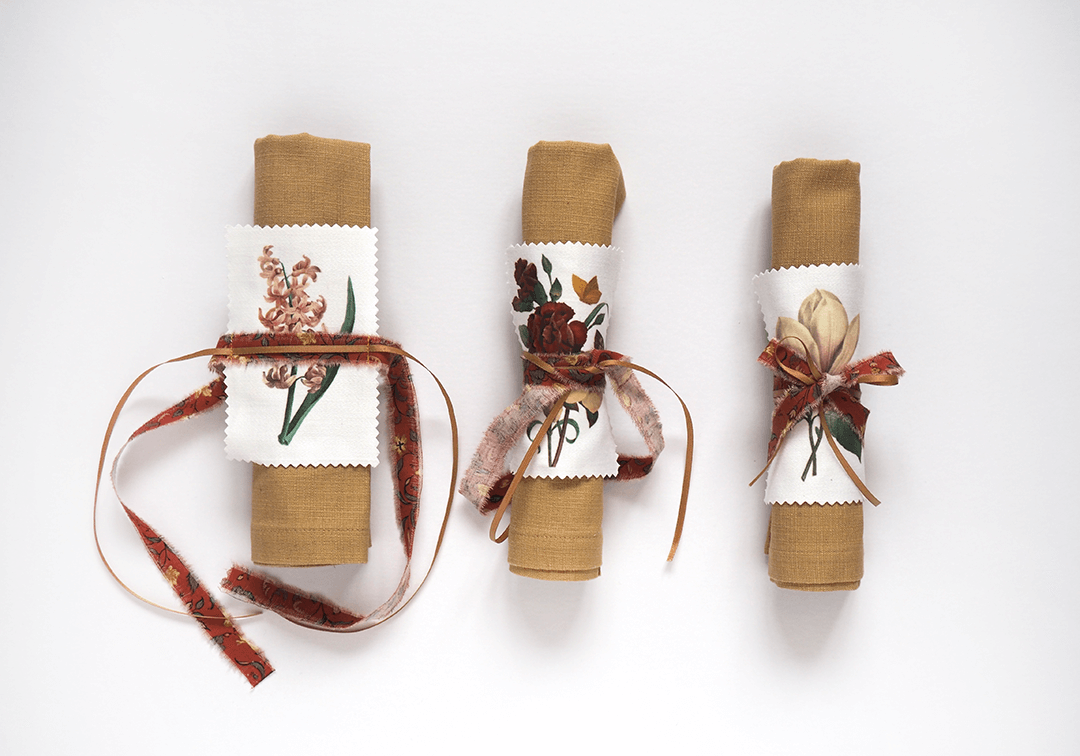
10. All you have left to do is tie them around your napkins. Roll the napkin, place the ring on top, tie the strips around it and finish with a bow. Congratulations, you’re done!

If you liked this tutorial, please let me know and comment below. I'd love to hear about your creations.